
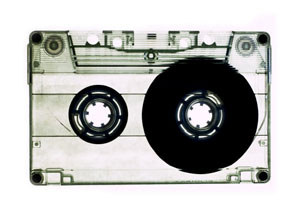
 I was asked for help to transfer a cassette tape to an audio CD. I found a great webpage, How to transfer a tape to a CD using Audacity, which provided most of the info. (Audacity is a free audio editing program.) The basic idea is to record from cassette tape to the computer and use the computer to burn an audio CD. Below are the steps I took:
Set the audio recording level and use Audacity to record from the cassette tape to the computer:
- Install Audacity. Because I am using Windows 7 64bit, I installed the recommended latest 1.3.13 Beta version.
- Connect the line-out jack on your cassette tape player (or headphone jack if there isn’t a line-out jack) to your computer’s line-in jack (or mic jack if there isn’t a line-in jack). (I will refer to line-in below; just substitute mic for line-in if you are using the mic input.)
- Start playing the cassette tape.
- You should hear the music from your computer speakers. If not, open up the computer speaker volume control (little speaker icon on the dock) and make sure that the line-in input is not muted.
- Adjust the audio input levels so that you don’t over-drive the speakers, basically play a sound louder than the maximum speaker volume. You can adjust the input levels using two controls: the volume on your cassette player and the line-in volume level control on the computer. There isn’t a single correct way of doing this; below are my recommended steps.
- Set the line-in volume level on the computer to 50%. On Windows 7, right-click on the speaker icon in the dock, select Recording Devices, select “Line In”, click on Properties button, and adjust the drag bar to midway.
- While watching the line-in volume level meter (in the same Recording Device “Line In” Properties dialog, you should see a volume meter that changes with the sound), adjust the cassette tape player volume so that the line-in volume level meter comes close to, but never reaches max.
- If you feel the cassette tape player volume is too low (a perfect setting is one quarter up to one half), then adjust the line-in volume level down and the cassette player volume up. Or if you feel the cassette player volume is too high, then adjust the line-in volume level up and the cassette player volume down.
- You don’t need to be perfect at this point because we will do an additional adjustment below.
- Double-check your sound levels by running Audacity, making sure that Stereo is selected in the Input Channels dropdown (in the middle of the bottom toolbar), and clicking on the Record button. Audacity will create a stereo track (with two bar graphs) to show the sound waveforms as they are recorded.
- Look at the top-right of the Audacity window to see Audacity’s volume level meters for L (left) and R (right). You should see the levels changing as the sound plays. The “0” marker on the far right represents the maximum level.
- Adjust the line-in volume level and cassette tape player’s volume so that the sound level comes close but never reaches the “0” marker.
- It is better to be conservative and err on the side of not reaching the “0” marker, than exceeding it. (Exceeding it will saturated the recorded waveform, which is not a good thing.)
- Stop the Audacity recording and stop the cassette tape player. Rewind the tape to the beginning.
- At this point, check to see whether your cassette tape is mono or stereo. If you look at Audacity and see two soundwave graphs (for left and right speakers) in the Audio Track, then it is stereo. If you see only one soundwave graph (the other is a blank grey box), then it is mono.
- If it is mono, then select Mono in the Input Channels’ drop-down list which is in the middle of the bottom toolbar located above the Audio Track. The next time you record, a single mono Audio Track will be created (instead of a stereo track).
- Delete the Audio Track by clicking on the X icon on the top-left of the Audio Track pane.
- We are ready to record from the cassette tape to the computer. Start playing the cassette tape. As soon as you can, hit Record in Audacity.
- Wait for the tape to finish playing and stop recording in Audacity. (Regular cassette tapes usually have 45 minutes recording on each side.) If your cassette tape player doesn’t automatically play side B after side A, then you can repeat these steps with side B separately.
- At this point, you can save the audacity project. The output will be a *.aud project file and a directory containing the recorded audio in WAV file format.
Use Audacity to clean the recording, mark the individual songs, and export each song as a WAV file:
- When recording from a cassette tape, there will be a hissing background noise which we want to get rid of. Also, we want to normalize the sound level.
- Use Audacity to normalize the sound level by select the whole audio track (menu Edit->Select->All) and applying Normalize (menu Effect->Normalized). Accept the defaults in the Normalize dialog (“Remove any DC offset” and “Normalized maximum amplitude to: -0.0 db” selections are checked). The webpage I referenced above suggests normalizing to “-0.3 db” but that instruction doesn’t apply to the latest Audacity version which accepts “-0.0 db” as the maximum.
- Use Audacity to remove the background hissing noise.
- Select a portion of the audio track which represents silence; either the space at the beginning, end, or between the songs. Then get a noise profile (menu Effect->Noise Removal… and click on the “Get Noise Profile” button” in Step 1) so Audacity will know what to remove from the whole track.
- Select the whole audio track (menu Edit->Select->All) and apply the Noise Removal (menu Effect->Noise Removal). In the Noise Removal dialog, take the defaults in Step 2 (Noise reduction dB should be 24 which is middle of the range, etc.) and hit OK. This operation may take a minute or two.
- Mark the breaks between songs so Audacity will recognize when a song begins and ends. (This will allow us to create an audio CD with multiple song tracks, allow skip forward/reverse, instead of an audio CD with one huge song track.) This is a manually instensive and time consuming task.
- To make it easy to view the breaks between songs, set the zoom to normal (View->Zoom Normal) and maximize the Audacity window.
- Starting from the beginning of the audio track, move the scrollbar at the bottom to the right by clicking on the right arrow (to move the viewable audio track by small increments) or by clicking on the empty space to the left of the right arrow (to view the audio track viewable chunk by viewable chunk).
- Look for song breaks which occur when the soundwave graphs go to zero (you will see a single line). Click in the middle of the song break section and tag it as a new song track (menu Tracks->Add Label at Selection). You can name the label if you wish to.
- You can double-check that it is actually a song break by clicking before the break and hitting play to listen to the end of the current song, the silent break, and the start of the next song.
- Once you have looked at the whole audio track and are confident that you have identify the song breaks, export each song as a separate WAV file by going to menu “File->Export Multiple…”. Input an export location directory, make sure “Labels” is selected”, click on “Include audio before first label” if you didn’t put a tag before the first song, and click on the Export button.
- Answer Yes if you are prompted to create the export location directory. You will be prompted to add more info for each song to be exported, just hit OK each time.
- Once done, if you go to the export location directory, you should see a WAV file for each song.
At this point, use a CD burning software, such as Nero Burning ROM, to burn the individual song WAV files to an audio CD. An audio CD is 80 min long so if you are lucky, you might be able to fit the whole cassette (both sides A and B) onto one audio CD.
Good luck and have fun!
Nice article! Very informative and detailed for those true DYI-er’s! Thanks for sharing your ideas and insight!