
I purchased a 2015 Macbook Air 13. It came with Mac OS X 10.10 Yosemite. I decide to install macOS 10.14 Mojave. (I am not ready to move to 64bit only with macOS 10.15 Catalina.)
 After booting from my USB flash drive containing the macOS 10.14 Mojave installer, I run the “Disk Utility” and erase the internal drive, selecting APFS (Apple File System) as the target file system. APFS is the latest file system, first supported by macOS 10.13 High Sierra.
Unfortunately, formatting as APFS is a mistake when upgrading from a very old macOS version like Yosemite.
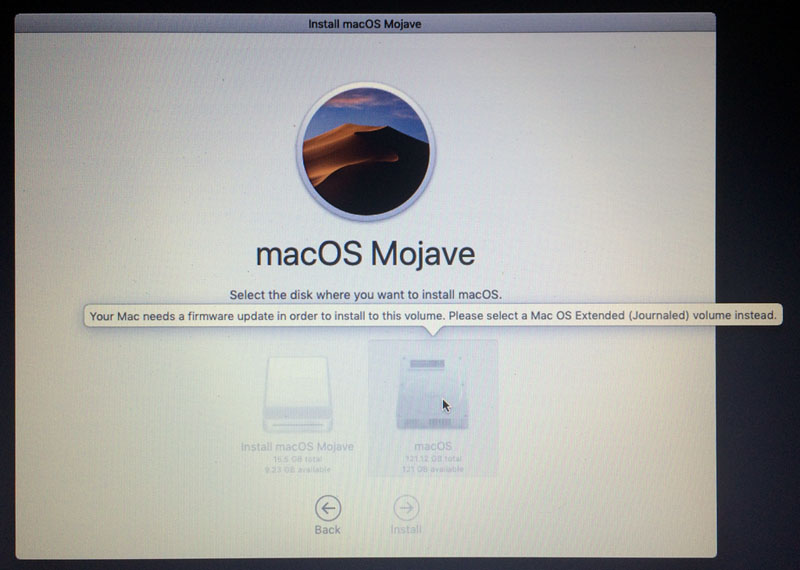
When I proceed to install macOS 10.14 Mojave, the installer shows the internal drive as a greyed-out option. The pop-up tip on it reads “Your Mac needs a firmware update in order to install to this volume. Please select a Mac OS Extended (Journaled) volume instead”.
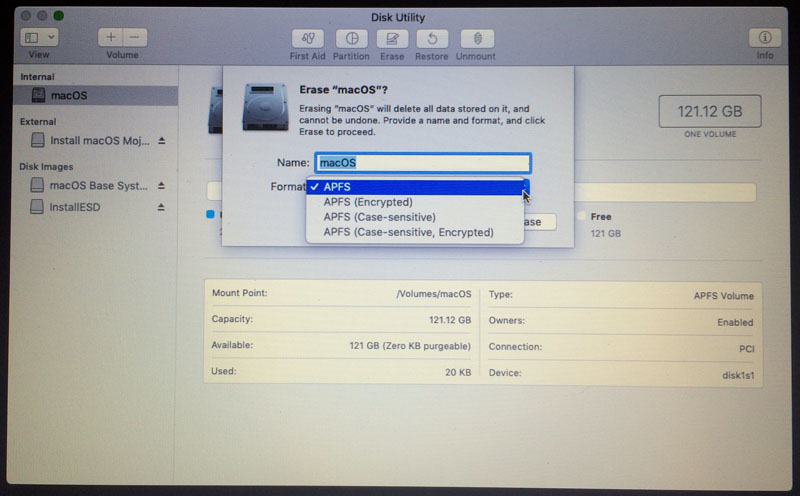 No problem, I think. I quit the installer and run “Disk Utility”. However, when I attempt to erase the internal drive, the only file system options shown are APFS variations.
Note: Below, “HFS+” is “Mac OS Extended” and “JHFS+” is “Mac OS Extended (Journaled)”.
A quick google search leads me to this page, How to Revert a drive from APFS back to HFS+. The main point is that if the “Disk Utility” application fails to do something, the “diskutil” (disk utilities) command line is almost always the solution.
I quit “Disk Utility” and launch the Terminal. I then run the diskutil commands below:
# Note the identifier for the Apple_APFS partition, which is "disk0s2".
[-bash-3.2# diskutil list
/dev/disk0 (internal, physical)
#: TYPE NAME SIZE IDENTIFIER
0: GUID_partition_scheme *121.3 GB disk0
1: EFI EFI 209.7 MB disk0s1
2: Apple_APFS Container disk1 121.1 GB disk0s2
/dev/disk1 (synthesized):
....
# Delete the APFS partition, which will reformat it to JHFS+ format
[-bash-3.2# diskutil apfs deleteContainer /dev/disk0s2
Started APFS operation on disk1
Deleting APFS Container with all of its APFS Volumes
Unmounting Volumes
Unmounting Volume "macOS" on disk1s1
Deleting Volumes
Deleting Container
Wiping former APFS disks
Switching content types
Reformatting former APFS disks
Initialized /dev/rdisk0s2 as a 113 GB case-insensitive HFS Plus volume with a 16384k journal
Mounting disk
1 new disk created or changed due to APFS operation
Disk from APFS operation: disk0s2
Finished APFS operation on disk1
Just to be sure, I quit the Terminal and launch the “Disk Utility” application. The internal drive is now named “Untitled”. This time, I am allowed to select “Mac OS Extended (Journaled)” when erasing the internal drive. I do so.
Finally, the macOS 10.14 Mojave installer allows me to select the internal drive and the installation proceeds successfully. At the end of the process, the internal drive is formatted as APFS. Evidently, the Mojave installer updates the firmware and then converts the internal drive to APFS as part of the installation process.
You saved my evening. Thanks for posting this!
Tons of thanks , this work for me,.
Thnx mate you’re the best, very clear. Love you from the bottom of my heart.
This was the solution I was looking for as well. Thank you for taking the time to document and post this.
Terrific, awesome, just what I needed to know to fix this mac. Mahalo
This worked perfectly! Very simple and worked exactly right.
Thanks for posting
I ran into the same problem. Unfortunately I had already wiped the drive. What I did instead is to go to partitions on Disk Utility and repartitioned it using Journaled format.