
See my previous post in my unmanaged VPS (virtual private server) series, Nginx Multiple Domains, Postfix Email, and Mailman Mailing Lists, to learn how to configure multiple domains and get Postfix email and Mailman mailing lists working. In this post, I will configure Nginx to enable HTTPS SSL access and password-protect a directory.
Note: Though I’m doing the work on a DigitalOcean VPS running Ubuntu LTS 12.04.3, the instructions may also apply to other VPS providers.
Enable HTTPS/SSL Acess
I have a PHP application which I want to secure. If I use HTTP, then the information sent back from the server to my browser is in clear text (and visible to anyone sniffing the network). If I use HTTPS (HTTP Secure) with a SSL (Secure Sockets Layer) server certificate, then the information will be encrypted. In the steps below, I will configure HTTPS/SSL to work for a domain and then force HTTPS/SSL access on a particular directory (where the PHP application would be located).
To get HTTPS working, we need a SSL server certificate. While you can get a 3rd party certificate authority to issue a SSL certificate for your domain for about $10 per year, I only need a self-signed certificate for my purpose. A 3rd party issued SSL certificate is convenient because if the browser trusts the 3rd party certificate authority by default, the browser won’t prompt you to accept the SSL certificate like it would for a self-signed certificate (which the browser can’t establish a chain of trust on). If you run a business on your website, I recommend investing in a 3rd party SSL certificate so that your website would behave professionally.
Create a self-signed SSL server certificate by running these commands on the server:
Note: You don’t need to input the lines that start with the pound character # below because they are comments.
sudo mkdir /etc/nginx/ssl
# Change to the newly-created ssl directory. Files created below will be stored here.
cd /etc/nginx/ssl
# Create a private server key.
sudo openssl genrsa -des3 -out server.key 1024
# Remember the passphrase you entered; we will need it below.
# Create certificate signing request.
# (This is what you would send to a 3rd party authority.)
sudo openssl req -new -key server.key -out server.csr
# When prompted for common name, enter your domain name.
# You can leave the challenge password blank.
# To avoid Nginx requiring the passphrase when restarting,
# remove the passphrase from the server key. (Otherwise, on
# reboot, if you don't input the passphrase, Nginx won't run!)
sudo mv server.key server.key.pass
sudo openssl rsa -in server.key.pass -out server.key
# Create a self-signed certificate based upon certificate request.
# (This is what a 3rd party authority would give back to you.)
sudo openssl x509 -req -days 3650 -in server.csr -signkey server.key -out server.crt
Note: I set the certificate expiration time to 3650 days (10 years); 3rd party certificates will usually expire in 365 days (1 year). The maximum expiration days you can input is dependent upon the OpenSSL implementation. Inputting 36500 days (100 years) would probably fail due to math overflow errors (once you convert 100 years into seconds, the value is too big to store in a 32bit variable). I believe the highest you can go is about 68 years, but I haven’t tested it.
Configure Nginx to use the SSL server certificate we created by editing the server block file for the domain you want to use it on:
In the “domain2” server block file, find the commented-out “HTTPS server” section at the bottom, uncomment it, and edit it to look like the following:
#
server {
listen 443;
server_name mydomain2.com www.mydomain2.com;
root /var/www/mydomain2;
index index.php index.html index.htm;
ssl on;
ssl_certificate /etc/nginx/ssl/server.crt;
ssl_certificate_key /etc/nginx/ssl/server.key;
# ssl_session_timeout 5m;
#
# ssl_protocols SSLv3 TLSv1;
# ssl_ciphers ALL:!ADH:!EXPORT56:RC4+RSA:+HIGH:+MEDIUM:+LOW:+SSLv3:+EXP;
# ssl_prefer_server_ciphers on;
location / {
try_files $uri $uri/ /index.php;
}
# pass the PHP scripts to FPM-PHP
location ~ \.php$ {
fastcgi_split_path_info ^(.+\.php)(/.+)$;
fastcgi_pass unix:/var/run/php5-fpm.sock;
fastcgi_index index.php;
include fastcgi_params;
}
}
Note: The “HTTPS Server” section looks like the “HTTP Section” we configured previously at the top, except for the addition of “listen 443” (port 443 is the HTTPS port) and the SSL enabling configurations.
Open up the HTTPS port in the firewall and reload Nginx by running these commands on the server:
sudo ufw allow https
# Double-check by looking at the firewall status.
sudo ufw status
# Reload Nginx so changes can take effect.
sudo service nginx reload
Test by browsing to “https://mydomain2.com/”. When the browser prompts you to accept the self-signed server certificate, answer Yes.
Require HTTPS/SSL Access on a Directory
To require HTTPS/SSL-only access on a particular subdirectory under the domain, we need to add a directive to the domain’s HTTP Server to redirect to the HTTPS Server whenever a browser accesses that directory.
Note: Apache uses a .htaccess file to allow users to configure such actions as redirecting or password-protecting directories. Nginx does not use .htaccess; instead, we will put such directives in the server block files.
Create a secure test directory by running these commands on the server:
sudo mkdir /var/www/mydomain2/secure
# Create a secure test page.
sudo nano /var/www/mydomain2/secure/index.html
# Input this content:
<html><body>
This page is secure!
</body></html>
# Change owner to www-data (which Nginx threads run as) so Nginx can access.
sudo chown -R www-data:www-data /var/www/mydomain2/secure
Edit the domain’s server block file by running this command on the server:
Under the “domain2” server block file, in the “HTTP Section” at the top (not the “HTTPS Section” at the bottom), add these lines to do the redirect:
#listen 80; ## listen for ipv4; this line is default and implied
#listen [::]:80 default ipv6only=on; ## listen for ipv6
...
# Redirect mydomain2.com/secure to port 443.
# Please put this before location / block as
# Nginx stops after seeing the first match.
# Note: ^~ means match anything that starts with /secure/
location ^~ /secure/ {
rewrite ^ https://$host$request_uri permanent;
}
...
location / {
...
}
Restart Nginx so the changes above can take effect.
Test by browsing to “http://mydomain2/secure/” and the browser should redirect to “https://mydomain2/secure/”.
Password-Protect a Directory
By password-protecting a directory (aka requiring basic authentication), when a browser accesses that directory, the user will get a dialog asking for the user name and password. To get this functionality working, we will create a user and password file and configure the Nginx server block to require basic authentication based upon that file.
Note: Accessing a password-protected directory over HTTP would result in the user and password being sent in clear text by the browser to the server.
Create a protected test directory by running these commands on the server:
sudo mkdir /var/www/mydomain2/protect
# Create a protected test page.
sudo nano /var/www/mydomain2/protect/index.html
# Input this content:
<html><body>
This page is password-protected!
</body></html>
# Change owner to www-data (which Nginx threads run as) so Nginx can access.
sudo chown -R www-data:www-data /var/www/mydomain2/protect
We will need a utility from Apache to create the user and password file. Run this command on the server to install and use it:
sudo apt-get install apache2-utils
# Create a user and password file using htpasswd.
sudo htpasswd -c /var/www/mydomain2/protect/.htpasswd myuser
# Add an additional user using htpasswd without "-c" create parameter.
sudo htpasswd /var/www/mydomain2/protect/.htpasswd myuser2
# Change owner to www-data (which Nginx threads run as) so Nginx can access.
sudo chown www-data:www-data /var/www/mydomain2/protect/.htpasswd
Note: If you move the “.htpasswd” file to another location (say, not under the domain’s document root), make sure that the “www-data” user or group can access it; otherwise, Nginx won’t be able to read it.
Edit the Nginx server block file by running this command on the server:
In the “domain2” server block file, in the “HTTP Section” at the top (not the “HTTPS Section” at the bottom), add these lines to password-protect the “/protect” directory:
#listen 80; ## listen for ipv4; this line is default and implied
#listen [::]:80 default ipv6only=on; ## listen for ipv6
...
# Password-protect mydomain2.com/protect directory.
# Please put this before location / block as
# Nginx stops after seeing the first match.
# Note: ^~ means match anything that starts with /protect/
location ^~ /protect/ {
auth_basic "Restricted"; # Enable Basic Authentication
auth_basic_user_file /var/www/mydomain2/protect/.htpasswd;
}
...
location / {
...
# Uncomment this section to deny access to .ht files like .htpasswd
# Recommend to copy this to the HTTPS server below also.
location ~ /\.ht {
deny all;
}
...
}
The “^~” in “location ^~ /protect/” above tells Nginx to match anything that starts with “/protect/”. This is necessary to ensure that all files and directories under “/protect/” are also password-protected. Because Nginx stops once it finds a match, it won’t process subsequent match directives, such as the PHP-FPM directive, and PHP scripts won’t execute. If you wish to run PHP scripts under the password-protected directory, you must copy the PHP-FPM directive (and any other directives) under the password-protected location directive like so:
...
# Password-protect mydomain2.com/protect directory.
# Please put this before location / block as
# Nginx stops after seeing the first match.
# Note: ^~ means match anything that starts with /protect/
location ^~ /protect/ {
auth_basic "Restricted"; # Enable Basic Authentication
auth_basic_user_file /var/www/mydomain2/protect/.htpasswd;
# pass the PHP scripts to FPM-PHP
location ~ \.php$ {
fastcgi_split_path_info ^(.+\.php)(/.+)$;
fastcgi_pass unix:/var/run/php5-fpm.sock;
fastcgi_index index.php;
include fastcgi_params;
}
# deny access to .ht files like .htpasswd
location ~ /\.ht {
deny all;
}
}
...
# pass the PHP scripts to FPM-PHP
location ~ \.php$ {
...
}
Restart Nginx so the changes above can take effect.
Test by browsing to “http://mydomain2/protect/” and the browser should prompt you to input a user and password.
Secure Mailman
To run Mailman under HTTPS/SSL, move the “location /cgi-bin/mailman” definition in the server block file, “/etc/nginx/sites-available/mydomain2”, from the HTTP server to the HTTPS server section.
You will also need to modify Mailman to use the HTTPS url:
sudo nano /etc/mailman/mm_cfg.py
# Change its default url pattern from 'http://%s/cgi-bin/mailman/' to:
DEFAULT_URL_PATTERN = 'https://%s/cgi-bin/mailman/'
# Propagate the HTTPS URL pattern change to all the mailists
sudo /usr/lib/mailman/bin/withlist -l -a -r fix_url
Note: It is not necessary to restart the Mailman service for the changes above to take effect.
If you only want the default URL Pattern change to apply to a specific mailing list, like “test@mydomain2.com”, use this command instead:
Take a Snapshot
DigitalOcean provides a web tool to take a snapshot image of the VPS. I can restore using that image or even create a duplicate VPS with it. Because my VPS is now working the way I need it to, it makes sense to take a snapshot at this time.
Unfortunately, performing a snapshot requires that I shutdown the VPS first. More unfortunate, the time required to take the snapshot varies from minutes to over an hour (more on this below). Worst, there is no way to cancel or abort the snapshot request. I have to wait until DigitalOcean’s system completes the snapshot request before my VPS is automatically restarted.
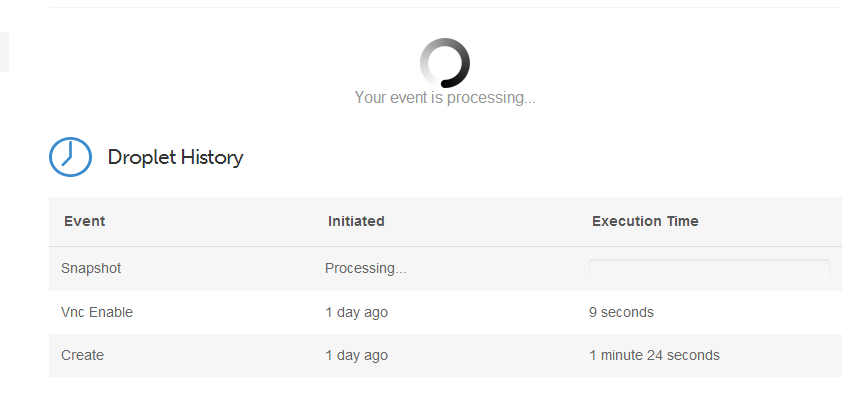 I did my first snapshot after getting WordPress working on the VPS. There was about 6GB of data (including the operating system) to make an image of. I shut down the VPS and submitted a snapshot request. The “Processing…” status with zero progress was what I saw for over one hour. During this time, my VPS and WordPress site was offline.
A little over an hour later, the status went from “Processing…” with zero progress to done in a split second. My VPS and WordPress site were back online. I think an hour to backup 6GB of data is excessive. DigitalOcean support agreed. Evidently, there was a backlog on the scheduler and requests were delayed. Because I couldn’t cancel the snapshot request, I had to wait for the backlog to clear in addition to however long it took to do the snapshot.
If I had known more about the snapshot feature, I would have opted to pay for the backup feature, which cost more but doesn’t require shutting down the VPS. Unfortunately, the backup feature can only be enabled during VPS creation so it is too late for me.
The recommended method to shutdown the VPS is to run this command:
sudo poweroff
Update: I just did a snapshot and it only took 5 minutes this time.
See my followup post, Upgrade Ubuntu and LEMP on an Unmanaged VPS, to learn how to upgrade LEMP and Ubuntu to the latest versions.
Most info above derived from:
- How To Create a SSL Certificate on nginx for Ubuntu 12.04
- ssl for subdirectoyr within nginx server configuration
- How To Set Up HTTP Authentication With Nginx On Ubuntu 12.10
- Password Protecting Directories With Nginx
- 4.27. Securing Mailman’s web GUI by using Secure HTTP/SSL
- How To Use DigitalOcean Snapshots to Automatically Backup your Droplets
[…] Nginx HTTPS SSL and Password-Protecting Directory […]