
 In my previous post, Setup Mac OS X 10.8 Mountain Lion, Windows 7 Boot Camp, and Shared FAT32 Partition, I decided to use Mac OS X as much as possible and in addition to Windows 7. It would be nice if I could use the same applications (or equivalents) on both operating systems. And it would be great if those apps made use of the same data whether running on Mac OS X or Windows 7. Effectively, I would like to share my apps between Mac OS X and Windows 7.
My methods for “App Sharing” in order of preference are:
- If both the Mac OS X and Windows 7 application versions use the same data format, then store that application data in a shared FAT32 partition (I had corruption issues with exFAT). If you don’t have a shared partition, you can use a private network share or even a cloud-based drive like DropBox (which introduces some security concerns).
- My favorite secured information storage apps, Keepass and Truecrypt, run under both Mac OS X and Windows 7 and use the same data files on the shared partition. (Note: I saw some comments that using a large Truecrypt file with Dropbox may have issues such as sync not working 100% or not working in a timely manner.)
- To a lesser extent, iTunes on Mac OS X and Windows 7 can use the same music and video files on the shared partition. Just run each iTunes and use the Mac OS X “File->Add to Library” or Windows 7 “File->Add Folder to Library” menu option. If you wish to sync your iPod, iPhone, or iPad to either the Mac OS X or Windows 7 iTunes, make sure they share the same library identifier; see my post, Sync an iPod Touch to Two Computers, for instructions.
- If the Mac OS X and Windows 7 application versions don’t use the same data format, then they might support cloud sync’ing. My primary concern with the cloud is security, because a copy of my information will be accessible on the Internet and stored in a hard drive belonging to a company which might not always have my privacy as its top priority. It is a lot less secure than just having a local copy on my hard drive. To mitigate this, I will remove all sensitive information before using the cloud.
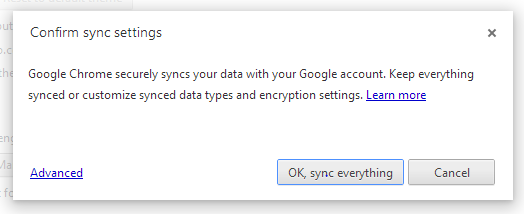
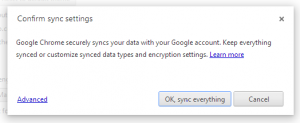 The browser I use, Chrome, supports sync’ing bookmarks, tabs and extensions to/from Google. It’s as simple as going to Settings, “Signing in to Chrome” (specifically, providing your Google account’s username and password), and clicking on “OK, sync everything”. If you sign in from multiple machines, the bookmarks will be merged. To see tabs opened on other machines, create a new blank tab and click on the “Other devices” link at the bottom.
- The latest version of my favorite note taking application, Evernote, runs on both Mac OS X and Windows and supports cloud sync’ing. For sensitive info, the latest Evernote offers an option to password-protect-encrypt a note. I am using an old, non-cloud-enabled version 2.1 of Evernote for Windows and plan to upgrade to the latest cloud-enabled versions on Mac OS X and Windows 7.
- My contact information and notes are stored in a Personal Storage Table (PST) file used by Microsoft Outlook for Windows. I found that Outlook 2003, 2007, and 2010 for Windows used the same PST file without any issues. And Outlook 2010 for Windows can cloud sync directly to Google Contacts and Notes (Google provides sync tools for Outlook for Windows). Unfortunately, Outlook 2011 for Mac OS X does not use PST and does not support cloud sync’ing directly to Google. However, Outlook 2011 for Mac OS X can sync to the Mac OS X Mountain Lion’s Contacts (new name for Address Book) and Notes applications, and the Contacts and Notes application can cloud sync directly to Google. (If you don’t want to use Google, there is a way to use iCloud instead for the same purpose.)
- If I wish to sync my contacts and notes in Outlook to an iPhone or Android phone, the above method of cloud-sync’ing to Google Contacts and Notes will help. I can sync contacts and notes on the iPhone and Android phone directly to/from Google. Alternatively, for iPhone, I can use iTunes sync with Outlook on Windows, or iTunes sync with Contacts and Notes on Mac OS X.
- If the Mac OS X and Windows 7 application versions don’t use the same data format and don’t support cloud sync’ing, they will usually provide an export/import migration path between the Mac OS X and Windows 7 application versions. In this case, I would just migrate to using the application solely on Mac OS X. In the future, if I need to, I can migrate back to Windows 7.
- My expense tracking application, Quicken, supports migrating data from the Windows version to Mac OS X version. Because Quicken for Mac OS X may not have the same set of features as for Windows, you will want to research whether the Mac OS X version will fit your needs. I plan to upgrade from Quicken 2003 for Windows to Quicken Essentials 2010 for Mac OS X.
Moving from Evernote 2.1 for Windows to Evernote 4.5 for Windows and Evernote 3.3 for Mac OS X
Evernote supports export/import but there was an export data format change between Evernote 2.1 and the latest Evernote versions. I found a forum post, New user help-importing Evernote 2.0 files into Evernote 4.1, which indicated that we need to use Evernote 3.1 for Windows to import the old Evernote 2.1 format and then export to the new data format. Actually, I found that Evernote 3.1 was cloud-enabled, so there was no need to export because the imported 2.1 notes were sync’ed directly to the cloud.
Here’s how I migrated from Evernote 2.1 to the latest version:
- Run Evernote 2.1 for Windows. There is no need to do an export because the exported “ENExport.enx” file won’t be usable.
- Look at the bottom status bar to see the total number of notes. It will say something like “Notes: 272” or “Notes: 15 of 272”.
- Quit Evernote 2.1. Do not uninstall it yet because we may need to use it later to verify that all notes were migrated.
- Install Evernote 3.1 for Windows (it will co-exist fine with Evernote 2.1). I was able to download a version of Evernote 3.1 from FileHippo.
- Run Evernote 3.1 and sign-in. You will need to register for an Evernote account, if you don’t already have one, to use Evernote. Even if you plan to only use locally stored notes, and not the cloud-sync’ed notes, you still need to have an account.
- Go to menu File->Import->Evernote 2.x Databases… and select your 2.1 database file “EverNote.enb”, which is usually located under the Evernote 2.1 install directory; for example: “C:\Program Files\Evernote\Evernote 2”. (Note: There is a menu option File->Import->Evernote Export Files… but it will ask for the new .enex export file which we don’t have.)
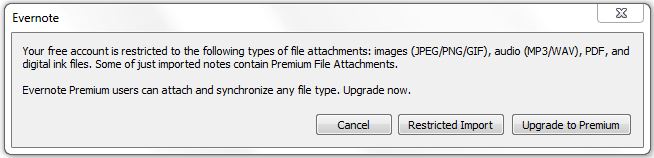
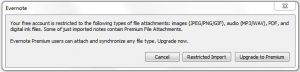 The import will occur. At the end, I got a warning message saying that some of my imported notes contained “Premium File Attachments” which are not supported under the free account. I didn’t think I was attaching any files that were not in the list of supported free file attachment types (also listed in the warning dialog), so I clicked on the “Restricted Import” button. “Restricted Import” appears to import all notes except the ones that have the premium file attachments.
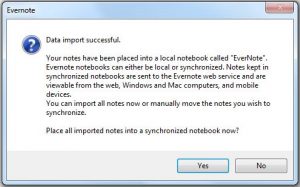 Once the import completed, a “Data import successful” dialog appeared and asked if I wanted to “Place all imported notes into a synchronized notebook now?” I answered Yes.
- Back in the main Evernote window, in the left navigation pane, I noticed a new notebook called “EverNote” under the Notebooks section. There is a sync icon before the name, which I guess means it is synchronized to the cloud. After the name is the number of notes in parenthesis; in my case, it shows as “Evernote (271)”.
- Since I had 272 notes in Evernote 2.1, it looks like one note was not imported, probably the one with the premium file attachment. Now to track down the missing note.
- I checked the log file by going to menu Tools->Options->General->Open Log folder and opening the “AppLog_[date].txt” file. (There is a “SyncLog_[date].txt” but it just contains logs from the cloud sync function, not the import function.) I scrolled to the bottom of the AppLog and saw this message, “272 notes successfully imported”. There wasn’t any message about which note was not imported. Darn.
- Looks like I have to do a brute-force comparison with the old Evernote 2.1 notes. Thankfully, I filed my notes under many manual categories so it really helped to facilitate the comparison. On Evernote 3.1, in the left navigation pane, I opened up Tags->Manual categories. I started Evernote 2.1 and opened its Manual Categories. Then I checked the count of notes in each category to find a mismatch in the number. I was able to locate the missing note in Evernote 2.1. Strangely, it only had an embedded image and I was able to copy and paste it into Evernote 3.1 successfully. The count of notes in Evernote 3.1 went to 272. Problem solved.
- I noticed that all my imported notes had text saying “(needs sync)” in its title. Looks like I needed to synchronize the imported data to the cloud.
- I was concerned about the 60MB/month upload limit on a free Evernote account. To see the size of my database, I went to menu Tools->Account Properties and Database tab. My notes are mostly text so it was only 2.4MB in size. I think if your data is larger than 60MB, you might need to sign up for the premium account.
- In that same Account Properties dialog, under the Account Usage tab, I found how much of the 60MB/month limit I had already used; it said “”0.5MB out of 60 MB used” so far. You can also get to this tab by clicking on the “Current Monthly Usage” in the top ribbon-like bar.
- I clicked the Synchronize button at the top-left to sync against the cloud. The progress was reported in the bottom status bar to the right and looked like “Updating server database, 55% done”. Strangely, “Updating server database” went to 100% about 3-4 times, interspersed with “Updating client database…” progress messages.
- Once the sync was complete (no more status updates), my notes no longer had the “(needs sync)” text in the title. I double-checked the monthly usage and it still said “0.5MB out of 60 MB used”, instead of the 2.9MB that I expected. Oh well.
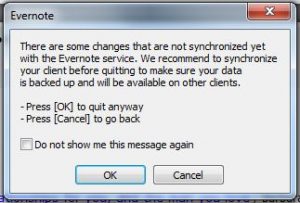 Exit Evernote 3.1. If you exit with unsynchronized notes (even notes in the trash), you will see a warning dialog. Just cancel the exit and do the sync and/or empty the trash.
- Uninstall Evernote 3.1 and re-install the latest Evernote 4.5 for Windows. You can also install the latest Evernote 3.3 for Mac OS X (from the Mac App Store).
- Once you sign-in to Evernote, the notes will sync down from the cloud. You can see the sync progress in the status bar; under Evernote 4.5, to show the status bar, go to menu View->Show status bar.


Sync’ing Contacts and Notes between Outlook 2010 for Windows and Outlook 2011 for Mac OS X
As described above, sync’ing contacts and notes between the Windows and Mac OS X versions of Outlook is complex, involving intermediate applications. I will do a separate post later about how to do the Outlook sync between Windows and Mac OS X.
Moving from Quicken 2003 for Windows to Quicken Essentials 2010 for Mac OS X
Because I use Intuit Quicken as a glorified expense tracking application where I manually input all the expenses and run summary reports, I was fine with using the very old Quicken 2003 for Windows. I used one Quicken file for each year and in the file, I used one account for each month. So, for each year, I could see the trend of how much I spent monthly (accounts listing) and how much I spent per category (itemized report).
From the reviews complaining that Quicken Essentials for Mac OS X is a glorified checkbook with transaction downloads from banks, it looks to be more than what I need because I didn’t want to download transactions from a bank. I don’t plan to provide my bank’s login credentials to anyone! After testing Quicken Essentials, I found that it was fine for my needs: manual expense input works great and the pre-defined summary, trend, and itemized category reports provided the info I wanted.
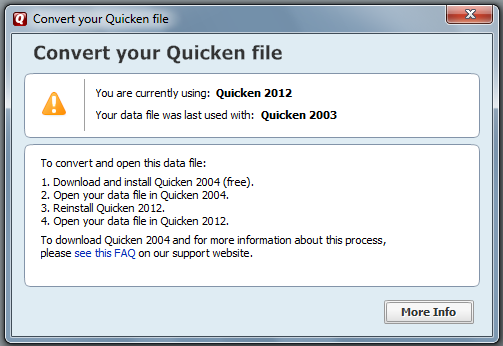 Unfortunately, to migrate from Quicken 2003 for Windows to Quicken Essentials for Mac OS X, I needed to upgrade to Quicken 2004 for Windows as an intermediate step. How do I know this? The Quicken Essentials’ converter tool told me so when I attempted to open a Quicken 2003 file.
Thankfully, Intuit provides a copy of Quicken 2004 free for anyone who needs to upgrade to Quicken 2005 and later from a version earlier than Quicken 2004. To download and install Quicken 2004 Deluxe, do the following:
- Browse to Using an Intermediate Version To Convert Older Versions of Quicken.
- Expand “Quicken for Microsoft Windows” and click on “Quicken 2004 for Windows” to download it. (Note: If you use Chrome, Chrome may report that the download page contains malware, but this is a false positive. Ignore it and click on the “proceed anyway” link.)
- Once downloaded, run “QW04DLX.exe” to install Quicken 2004 Deluxe.
To upgrade your data files from Quicken 2003 to Quicken 2004:
 Locate your Quicken 2003 data files (they come in file sets with extensions .QDF, .QEL, .QPH, and .QSD). By default, the data files are located in the Quicken installation directory under “C:\Program Files\Quicken” or “C:\Program Files (x86)\Quicken”, or they could be under the “My Documents\Quicken” or “Documents\Quicken” folder.
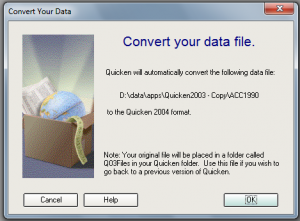
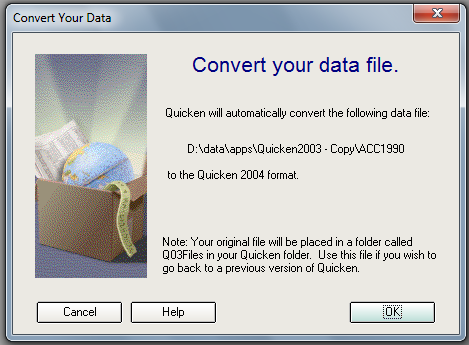
- Run Quicken 2004, go to File->Open, and select the 2003 .QDF file. Quicken 2004 will show a “Convert your data file” dialog, so confirm it by clicking on the OK button.
- Quicken 2004 will save the original 2003 data files under a “Q03Files” sub-directory and generate the updated 2004 data files (file sets using extensions .IDX, .QDF, QEL, .QPH, and .QSD).
- Repeat the above to upgrade other 2003 files.
To export the Quicken 2004 files to a format compatible with Quicken Essentials for Mac OS X (and Quicken 2012 for Windows):
- The Quicken Essentials install CD comes with a Windows converter program (insert the CD under Windows to access it) and a PowerPC converter program (which can only run in Mac OS X Snow Leopard or earlier) which can be used to convert Quicken 2004 files and later for use by Quicken Essentials.
- Because I didn’t have a Mac OS X Snow Leopard or earlier machine, I decided to run the converter under Windows. Instead of using the converter on the CD, I downloaded the latest Windows Quicken_converter.exe from Converting to Quicken Essentials for Mac from Quicken for Windows or MS Money: expand the “Convert your data from Quicken for Windows” section, look for the “Quicken_Converter_Setup.exe” reference, and click on the “you can download the converter here” link. (Note: If you use Chrome, Chrome will display a false malware warning which you can ignore by clicking on the “proceed anyway” link.)
- Run the downloaded “Quicken_Converter.exe” to install “Quicken Converter 2012”.
- Launch “Quicken Converter”.
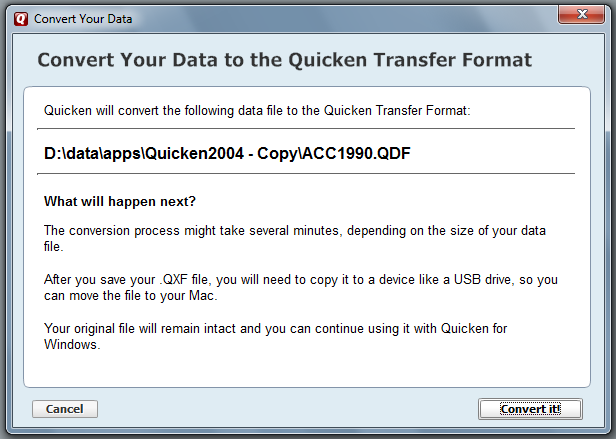
- Select “I’m transferring data from Quicken for Windows”, click “Get Started”, select “Open a data file located on this computer” and click “Select File”.
 Select your Quicken 2004 .QDF file and click “Convert it!” in the confirmation dialog.
- Once done, you will be asked to indicate the location to save the transfer file to. Click OK and select a directory. I selected the automatically created “Q12Files” sub-directory.
- Click Save and the resulting export .QXF file (and a new updated 2012 .QDF file) will be saved to the selected directory. This .QXF can be imported into Quicken Essentials for Mac OS X or Quicken 2012 for Windows. (I also think that Quicken 2012 for Windows can open the updated .QDF file directly.)
- Click “Convert Another” and repeat the above to convert other Quicken 2004 .QDF files.
To import the exported .QXF files into Quicken Essentails for Mac OS X:
- Copy the exported .QXF files from Windows to your Mac OS X machine. I suggest using the shared partition or a USB flash drive.
- Launch Quicken Essential for Mac OS X.
- Click “Create a New Document”, modify the file name (with extension .quickendata), and click Save. Quick Essentials will open with an initial blank setup.
- Go to menu “File->Import…” option.
- Select an exported .QXF file and click Open. Your data will be imported.
- Note: If you import data from more than a year ago, you might be concern that the import failed when Quicken Essential shows you an empty register. This is because almost all of the Quicken Essentials pages will filter on the “Last 12 Months” (look for the filter bar at the top). You will want to change that to “All Dates” in order to see entries older than one year.
- To import another .QXF file, go to menu File->New…, type the new filename (without the .quickendata extension) into “Save As:”, click Save, and repeat the import steps above.
- Note: Unfortunately, we can only import one .QXF into one Quicken Essentials file. If you attempt to import a second .QXF file, you will get a error message saying that it is not allowed.
Besides selecting “All Dates” to view older entries, I noticed that the accounts listing is sorted alphabetically and there is no way to override that. I had to rename the accounts to re-order the list to match my needs; for example, changing “Jan” to “01 Jan” and “Apr” to “04 Apr” so January will come before April instead of after. I also hid some columns that I didn’t use. Unfortunately, I had to make these changes for each account because there was no way to change things globally.