
 Note: Instructions will differ from scanner to scanner.
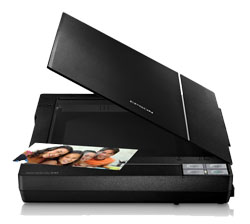
How to Scan in a Picture
- Run Adobe Photoshop.
- Go to menu File->Import->TWAIN32. Or pick your scanner if it shows. You should see the scanning dialog box.
- Make sure that you have selected the color option (others are grayscale and line drawing).
- For pictures, you just need to set the DPI resolution to 150 dpi (you can use the drop-down dialog or manually enter it).
- Put your picture in the scanner flushed against the corner with the arrow pointing to it. (Try to keep the glass surface on the scanner clean).
- Press the Preview button. A preview of the picture will be displayed.
- You can select 5×7 or 4×6 on the bottom drop-down box or you can manually move the dotted box to crop the picture.
- Press the Scan button. The picture will be scanned and placed into Adobe Photoshop.
- Close the scanning dialog (if it didn’t disappear).
- You should now be in Adobe Photoshop with the picture displayed.
- You can modify the picture by using the tools provided by Adobe Photoshop.
- Useful menu commands:
- Image->Adjust->Auto Contrast
- Image->Adjust->Auto Levels
- Image->Adjust->Color Balance
- Image->Adjust->Brightness/Contrast
- Useful menu commands:
- Once you are done, make sure you select Save or Save As to save the picture. The best and smallest format to save in is JPEG or JPG using High compression.
How to Scan in Text
- Run your Optical Character Recognition (OCR) program such as Recognita Standard OCR 3.2.
- Select menu Recognize->From Scanner. You will see the scanning input dialog.
- Select Grayscale mode.
- Scanning text requires a resolution of 200 dpi to 300 dpi (never go above 400 dpi). For now, select 200 dpi. If the text is very tiny, you can increase to 300 dpi.
- You may want to Preview at this point if you want to crop the text.
- In the next drop-down dialog, you can select Letter (8.5″ by 11″) or you can manually crop the text using the dotted box.
- Press the Scan button.
- Once the scan completes, the scanning dialog will disappear (if not, manually close it). You will be back in your OCR program.
- You can now make corrections and save the translated text by using menu File->Save Text As.