
 Creating an animated GIF is pretty easy with Adobe Photoshop. I will show you how I created the animated eye that you see to the right, using instructions from Build Animated GIFs in Photoshop. The secret is to use Photoshop’s Animation window.
Note: I found other web instructions that recommend using a Timeline window, but I could not find such a feature in my Adobe Photoshop CS5 version.
Layers Galore
The first step is to create layers, one or more of which together will construct each animation frame. While I could construct each frame using just one layer each, I decided to separate out the static “Animate Me” eyebrow image into its own layer and to include that layer in every frame.
 Create a new Photoshop project.
- The project is created with a default background layer.
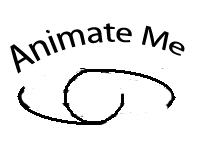
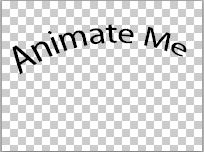
- Draw the eyebrow. In my case, I wrote the eyebrow text using the Typing Tool and then warped the text using the Arc style.
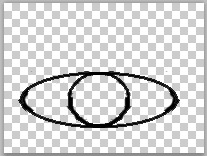
I drew the eye using an oval for the outer rim and a circle for the pupil. (I lost the original image so re-created it to the right below by horizontally flipping one of the partial eye image and combining. That’s why the lines look too thick.)
To animate the eye blinking, I subtracted and added arc lines as necessary.
 Create a new layer by using menu Layer, New, Layer…, and click Ok.
- Select the new layer.
- Draw the eye using a circle and an oval.
- Duplicate the eye layer using menu Layer, Duplicate Layer…, and click Ok.
- Edit the eye by subtracting and adding arc lines.
- Repeat the above to create additional eye layers as necessary.
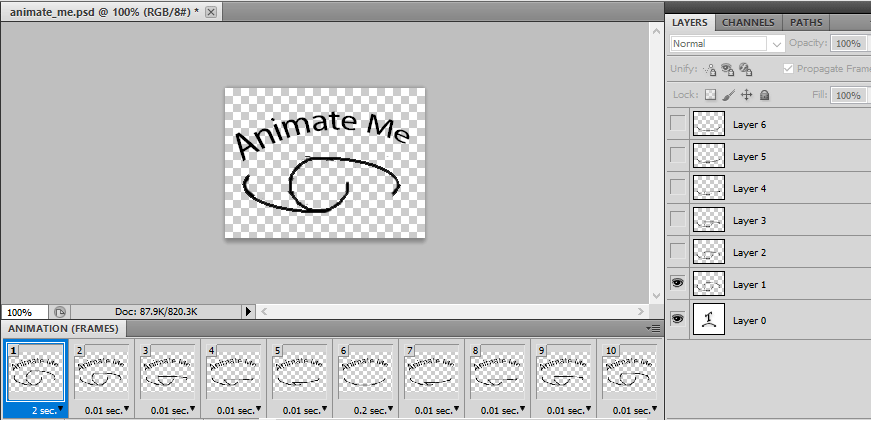
Animation Frames
Open the Animation window by going to menu Window and selecting Animation. The Animation window will appear at the bottom and there will be one frame already existing.
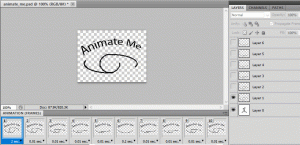 To create another frame, select the existing frame and then click on the page icon (“Duplicates selected frames”) to the left of the trash icon (“Deletes selected frames”) at the bottom of the Animation window.
- Repeat to create the number of frames you desire.
- Select each frame and then select the layer(s) you want to be visible in that frame.
- The number of second(s) under each frame indicates the delay before the animation moves to the next frame. Adjust those delay times accordingly.
Note: Selecting the frame determines what is visible on the screen (that is, whatever layers are selected as visible in that frame). Selecting the layer (in the Layer window) still determines which layer a graphical operation will affect. To avoid confusion, you might want to manually ensure that the layer you select is enabled for the frame selected.
Save that GIF
To save the project to an animated GIF file, use menu File, Save for Web & Devices…. I just accept the defaults and click Save.
Note: If you save using menu File, Save As…, and select Format as “CompuServe GIF (*.GIF)”, you will end up with a static GIF image (containing the layer selected in the frame selected), not an animated GIF.
To test the GIF file, open it in a browser. If you open it in the default image or photo viewer, you will only see the first frame and no animation.
For your reference, you can download my Photoshop project file, animate_me.psd, containing the eye animation above.