
I have a 15in Macbook Pro that can boot into Windows 7. For portability’s sake, I do not use a separate PC keyboard/mouse, but instead have adapted to using the Macbook’s keyboard and trackpad with Windows 7. Below are some customizations I made to make the Macbook keyboard and trackpad more useful with Windows. These instructions pre-suppose that the Apple Boot Camp Windows drivers have already been installed.
Customize the Macbook Keyboard
You can use the AutoHotkey utility to remap keys on the Macbook keyboard to adjust to your usage style. For example, I tend to use the delete key more often than the backspace key, so I usually swap the backspace key (the Mac “delete” key) with the delete key (the Mac “fn+delete” combo key). Here’s how I do the swap:
- Install and run AutoHotkey. I downloaded the AutoHotkey_L installer.
- Create a script text file named “SwapBSDel.ahk” (the .ahk extension is mandatory) with the following content:
Delete::Backspace
Backspace::Delete - Run the script by double-clicking on the “SwapBSDel.ahk” file to have AutoHotkey launch with it.
AutoHotkey is a very powerful tool. For example, here’s a way to add a menu to enable/disable the delete/backspace swap above.
Note: There are other key mapping utilities such as SharpKeys, but I prefer AutoHotkey because it is temporary and the key remaps only take effect when I run the script. If I want to apply the changes more permanently, I would configure the AutoHotkey script to run automatically during startup (put a shortcut to the script file in the Windows Startup folder).
Also, the Page Up/Down keys are missing from the Mac keyboard, but there are keyboard shortcuts: fn and up arrow for Page Up, fn and down arrow for Page Down, fn and left arrow for Home, and fn and right arrow for End.
Customize the Macbook Trackpad
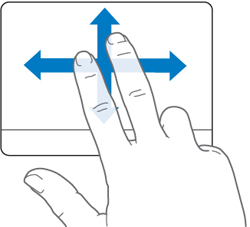 Because I configured one-finger tap-to-click/drag and two-fingers tap-to-right-click/scroll functionality with Boot Camp, I encountered several issues and also found their workarounds. To configure the one-finger and two-fingers tap functions, do the following:
- Run the “Boot Camp Control Panel” and go to the Trackpad tab.
- Under the One Finger section, check the “Tap to Click” and “Dragging” boxes.
- Under the Two Fingers section, check the “Secondary Tap” box.
- Click the OK button.
The two-fingers scroll is so fast that it is not useable with documents and browsers. To slow down the scrolling speed, I had to do the following:
- Run Control Panel.
- Type “mouse” into the “Search Control Panel”.
- Click on “Change mouse settings” and then the Wheel tab.
- Under “Vertical Scrolling”, change “The following number of lines at a time:” value to be 1, instead of 3.
- Click on the OK button.
When doing a multiple item selection and then drag to move/copy items, the double-tap-to-drag will deselect the items. I had to hold down the Shift (move) or Ctrl (copy) key to preserve the multiple selection when doing the double-tap-to-drag.
When doing a double-tap-to-drag on items and even a window, there is a half second pause after the double-tap, before the drag action occurs. This pause may interfere with your intention and result in unpredictable behavior; i.e., the window gets resized or moved to a random position. I’ve taught myself to insert a manual pause before doing the drag action to avoid this issue. (The problem is a known issue with the Boot Camp driver; unfortunately, even at this late version, Apple has not corrected it.)
There is a free 3rd party Mac trackpad driver called Trackpad++ which may solve the above drag-pause problem. In addition, Trackpad++ may help to eliminate the accidental drag-n-drop actions (which I encounter now and then) and provide support for 3-finger and 4-finger gestures. I will try it out one of these days.
Note: If you do not use the one-finger and two-fingers tap functionality, you may not encounter the issues above.
Customize the Windows 7 Aero Behavior
Because my Macbook’s 1440×900 resolution is not that large, the Windows 7 Aero Snap behavior (where windows are automatically maximized or resized when dragged close to the edges of the desktop) occurs quite frequently. In almost all cases, performing an Aero Snap is not my intention. Here’s how I disable the Aero Snap feature:
- Run Control Panel.
- Click on the green “East of Access” header link.
- Click on the blue “Change how your mouse works” link.
- Check the “Prevent windows from being automatically arranged when moved to the edge of the screen” box.
- Hit the OK button.
this was PERFECT!! thank you.
thanks…
Solve my longtime problems